Home > Denkfabrik > How to enable/disable Windows Defender PUA/PUP protection in Windows 10 Home/Pro
February 1, 2018
How to enable/disable Windows Defender PUA/PUP protection in Windows 10 Home/Pro
For improving Windows 10 enterprise security, Microsoft turned on PUA/PUP protection of Windows Defender by default. But, it has been turned off by default in Windows 10 Home and Windows 10 Pro. How to turn on Windows Defender PUA/PUP protection in Windows 10 Home and Windows 10 Pro?
Method 1: Use PowerShell cmdlets to configure the PUA protection feature
1, Press Win + S
2, Type powershell
3, Right click on Windows PowerShell, click Run as administrator
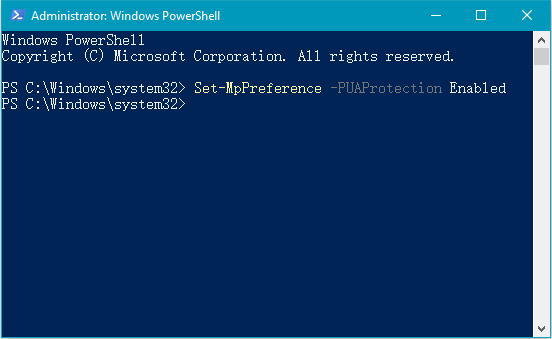
4, Enter the command:
Set-MpPreference -PUAProtection enable
5, Restart system, the PUA detection has been enabled.
Tip:
Setting the value for this cmdlet to Enabled will turn the feature on if it has been disabled.
Setting AuditMode will detect PUAs but will not block them.

Method 2: Edit Windows registry
Before start to edit Windows registry, please make a full registry backup. You can refer this page to learn How to back up full Windows registry.
1, Press Win + R
2, Type regedit, and press Enter
3, Expand and find:
HKEY_LOCAL_MACHINE/Software/Policies/Microsoft/Windows Defender
4, Right click on Windows Defender, select New – Key, and named MpEngine
5, Click on MpEngine, then right click on right area, select New – DWORD (32-bit) Value, named MpEnablePus
6, Double click MpEnablePus, set its Value data = 1
7, Restart system, then the PUA protection has been enabled.
Tip:
If you want to disable PUA detection, just change MpEnablePus value to 0, or delete registry entry MpEngine
Method 1: Use PowerShell cmdlets to configure the PUA protection feature
1, Press Win + S
2, Type powershell
3, Right click on Windows PowerShell, click Run as administrator
4, Enter the command:
Set-MpPreference -PUAProtection enable
5, Restart system, the PUA detection has been enabled.
Tip:
Setting the value for this cmdlet to Enabled will turn the feature on if it has been disabled.
Setting AuditMode will detect PUAs but will not block them.

Method 2: Edit Windows registry
Before start to edit Windows registry, please make a full registry backup. You can refer this page to learn How to back up full Windows registry.
1, Press Win + R
2, Type regedit, and press Enter
3, Expand and find:
HKEY_LOCAL_MACHINE/Software/Policies/Microsoft/Windows Defender
4, Right click on Windows Defender, select New – Key, and named MpEngine
5, Click on MpEngine, then right click on right area, select New – DWORD (32-bit) Value, named MpEnablePus
6, Double click MpEnablePus, set its Value data = 1
7, Restart system, then the PUA protection has been enabled.
Tip:
If you want to disable PUA detection, just change MpEnablePus value to 0, or delete registry entry MpEngine

 Download Center